

Combined Motion Test
The concept behind this motion test was to experiment in applying two different VEX codes and see how they can work together on a single shape. The first test was altering the scale of the sphere, where the second can manipulate the surface itself. The final product was using a mixture of the two to create a pulsing orb with a rippling exterior.
Houdini Set Up
Houdini Set Up

Applied VEX Code
Motion Test 01
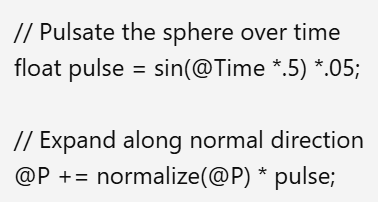
As shown above, the sphere is pulsing at a constant pace, but can be adjusted in scale and speed in the code above. The .02 in the sin(Time * .02) allows me to manipulate the speed, where the (* 4) at the end of the second line of code changes the volume.
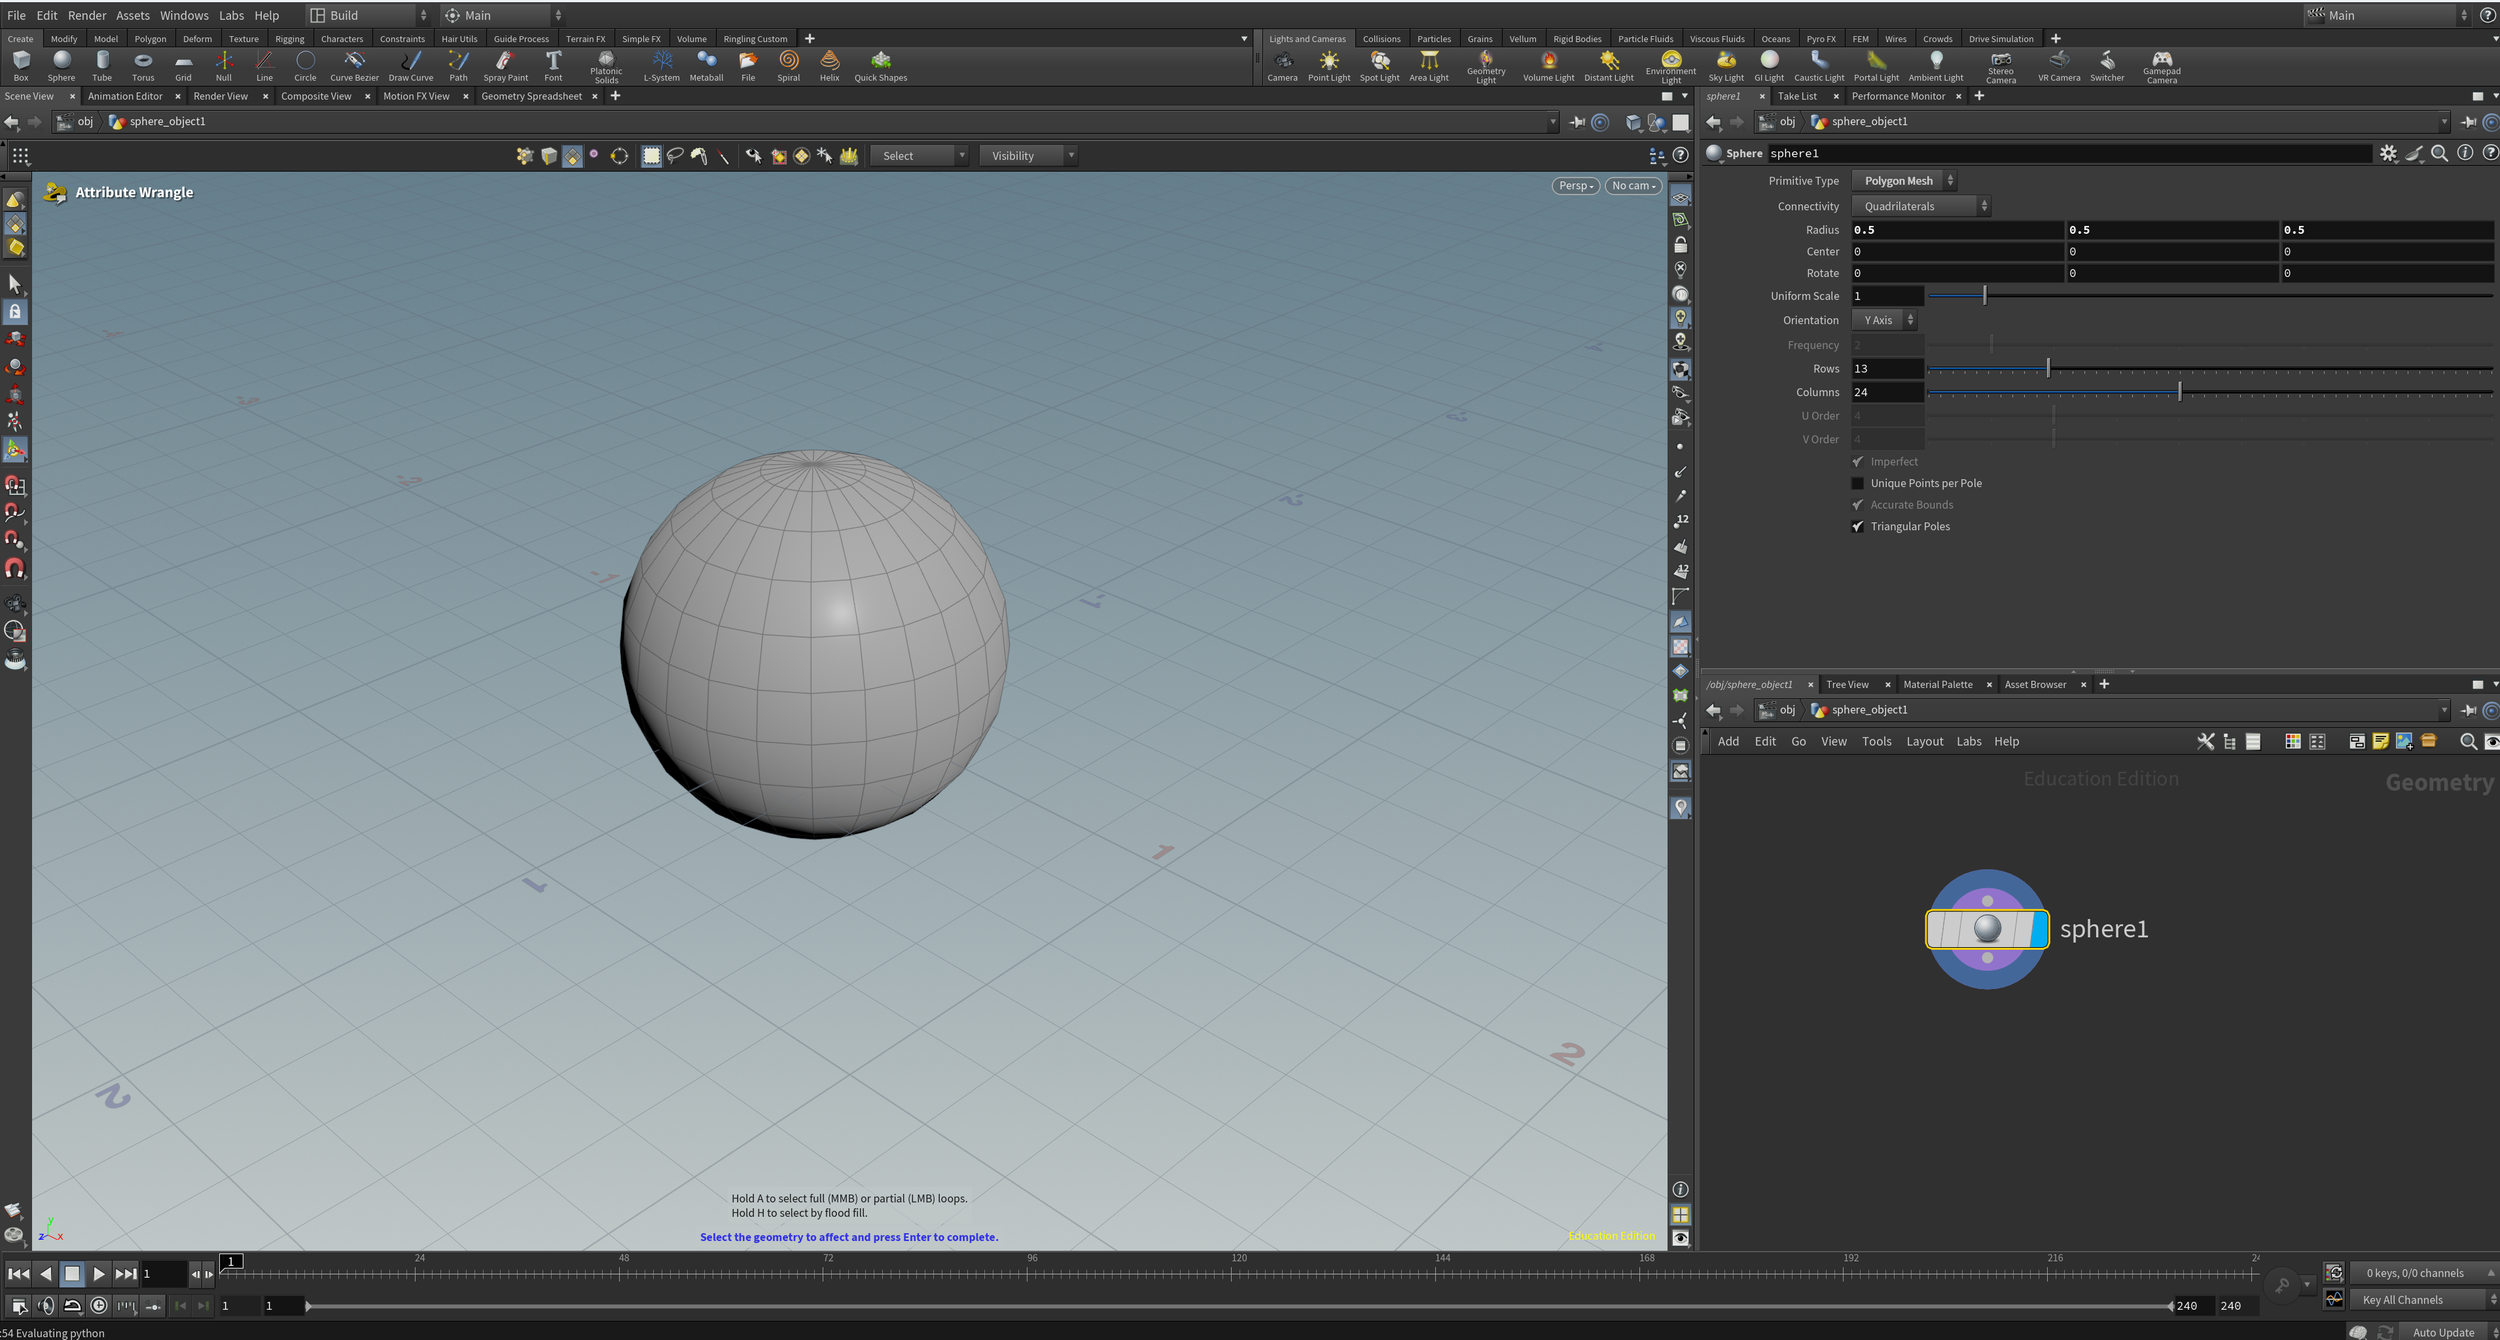
In order to apply the code, I needed to connect an ‘Attributewrangler' node to my sphere. I then pasted the code into the ‘VEXpression’ box above. An Attribute Wrangle in Houdini lets you change or create geometry data using small bits of VEX code. It's a fast, flexible way to control things like position, color, or custom attributes directly. I was fortunate enough to have the code work without adjusting my question in Claude.ai.
Vibecoding
Software Used:
Houdini
Claude.ai
ChatGPT
Design Challenge
I worked with Claude.ai to create a VEX/Python tool for Houdini. I documented the reasoning behind the tool, the full AI-assisted development process, and included a final demonstration showing that it works as intended.
Credits:
Code Provider;
Claude.ai
Motion Tests:
Hailey McMahon
Before applying the code from Clause.ai, I set up a single sphere in the obj tab in the lower right plate on the interface. This was so I could work on the geometry of the shape, where I can later bring it into the stage and apply it to my scene.
Final Thoughts
The goal of this exercise was to practice using AI to generate VEX code for my geometry. Even though the tests above weren’t directly usable in a real project, they were a helpful introduction to procedural texture building in Houdini. With more time, I could break down the code to understand how it works and how to apply similar techniques in future projects. Overall, I enjoyed experimenting with VEX and I'm interested in developing my skills further.
Using Claude.ai, I wrote “ Write VEX code for a point wrangle that makes a sphere pulsate over time using sin() based on @Time.” I wanted a code to transform the scale in a pulse and still be able to change the size of the pulse, as well as, the speed.
Claude.ai VEX Code
Motion Test 01
Applied VEX Code
Motion Test 02
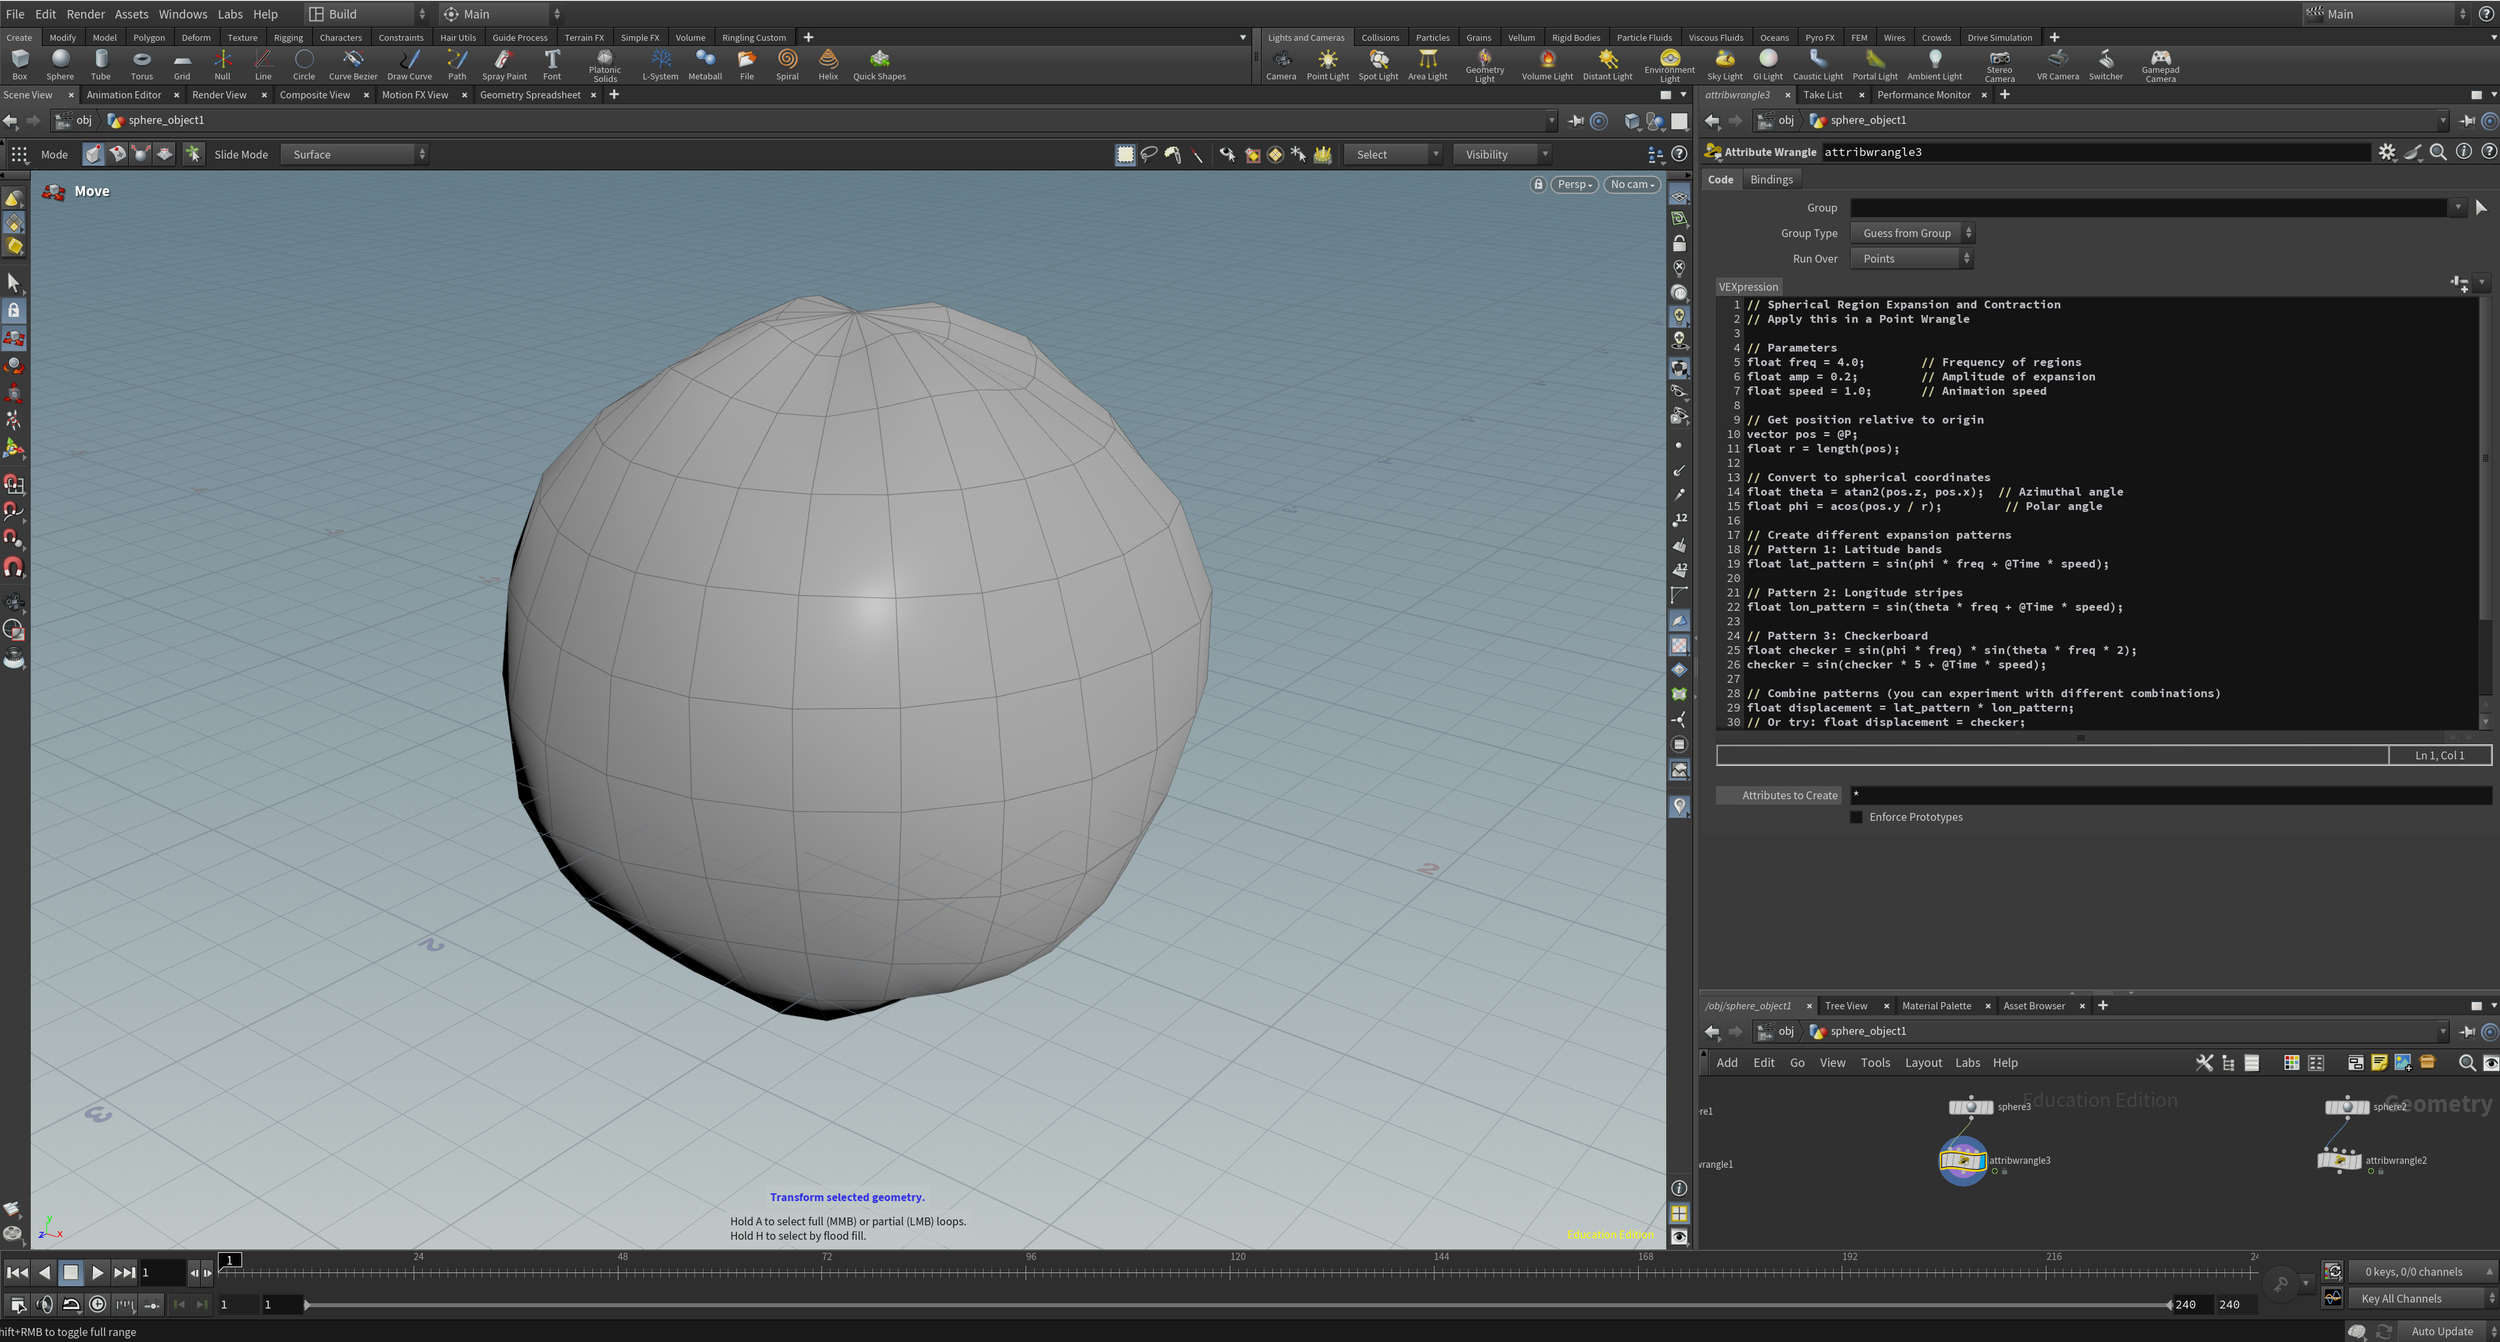
The motion test above shows a consistent pulsing of the surface itself that gives it fluidity.
Repeating what I did with my previous motion test, I applied the ‘Attributewrangler’ to my second sphere and pasted my new code into the ‘VEXpression"‘.
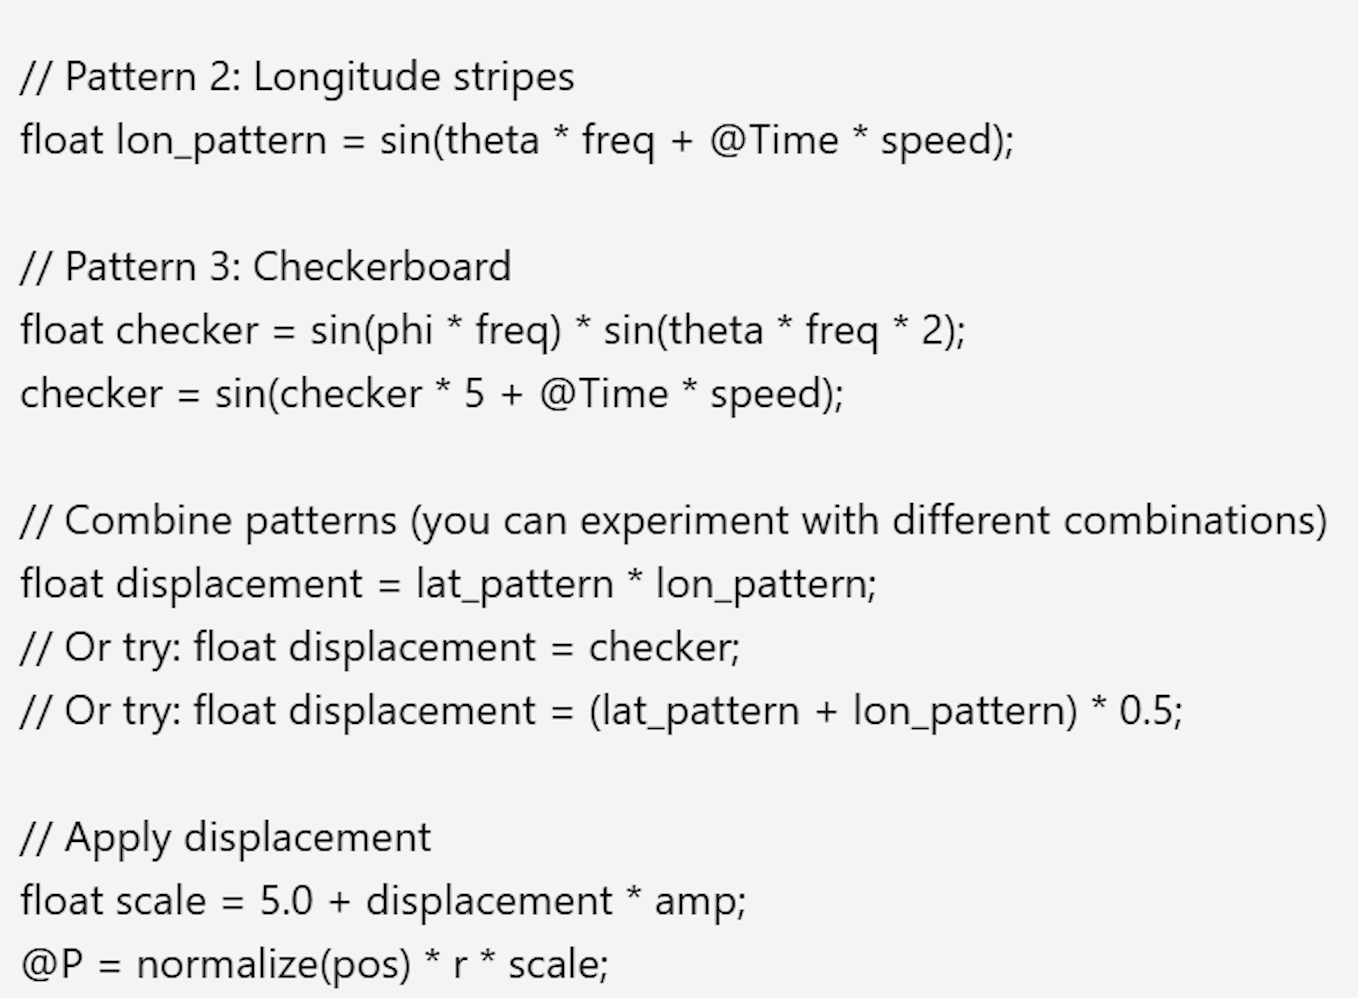
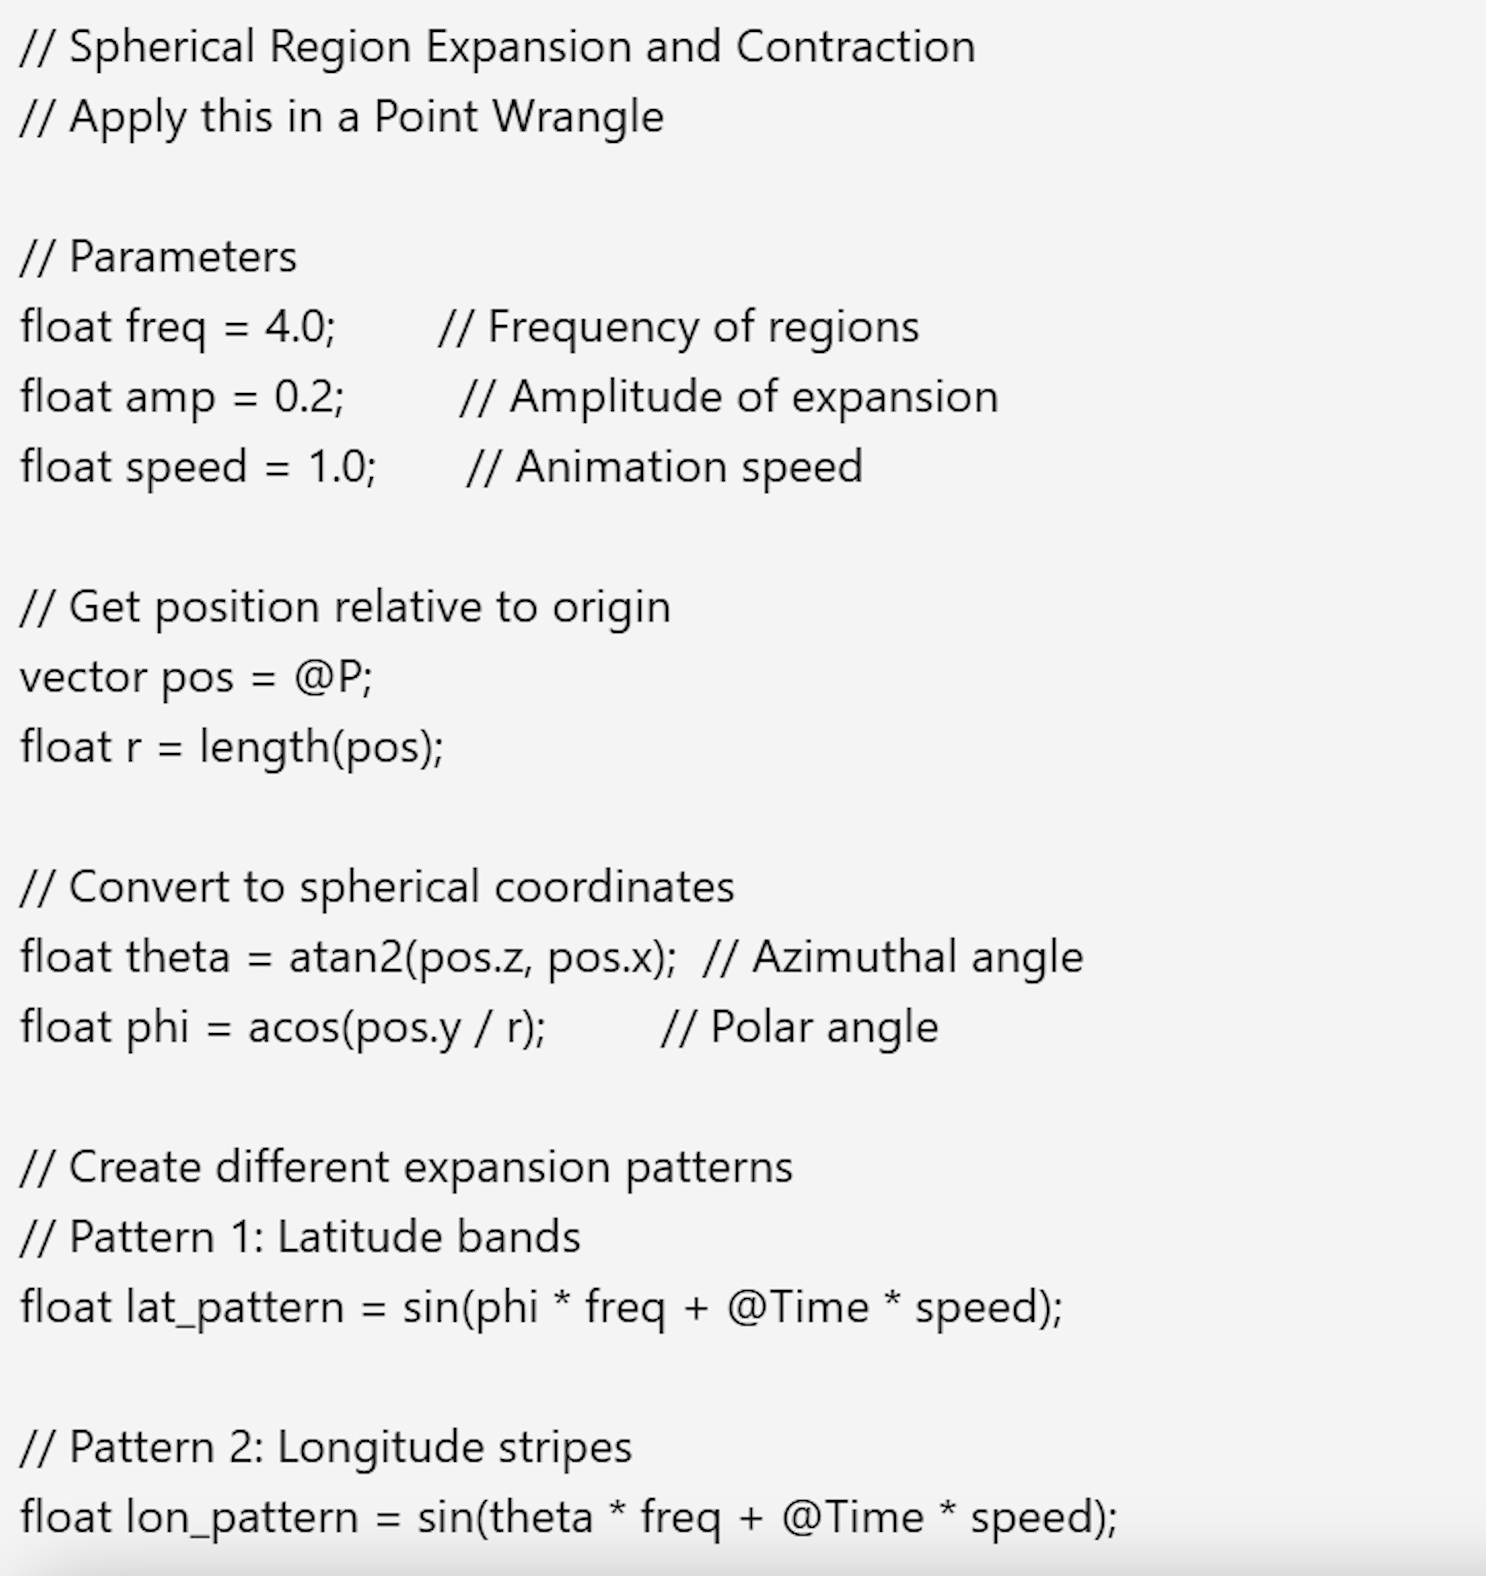
Using Claude.ai, I wrote “Write VEX that makes different regions of the sphere expand and contract using spherical coordinates.” I wanted this code to make the exterior of the sphere ripple throughout.
Motion Test 02

Claude.ai VEX Code
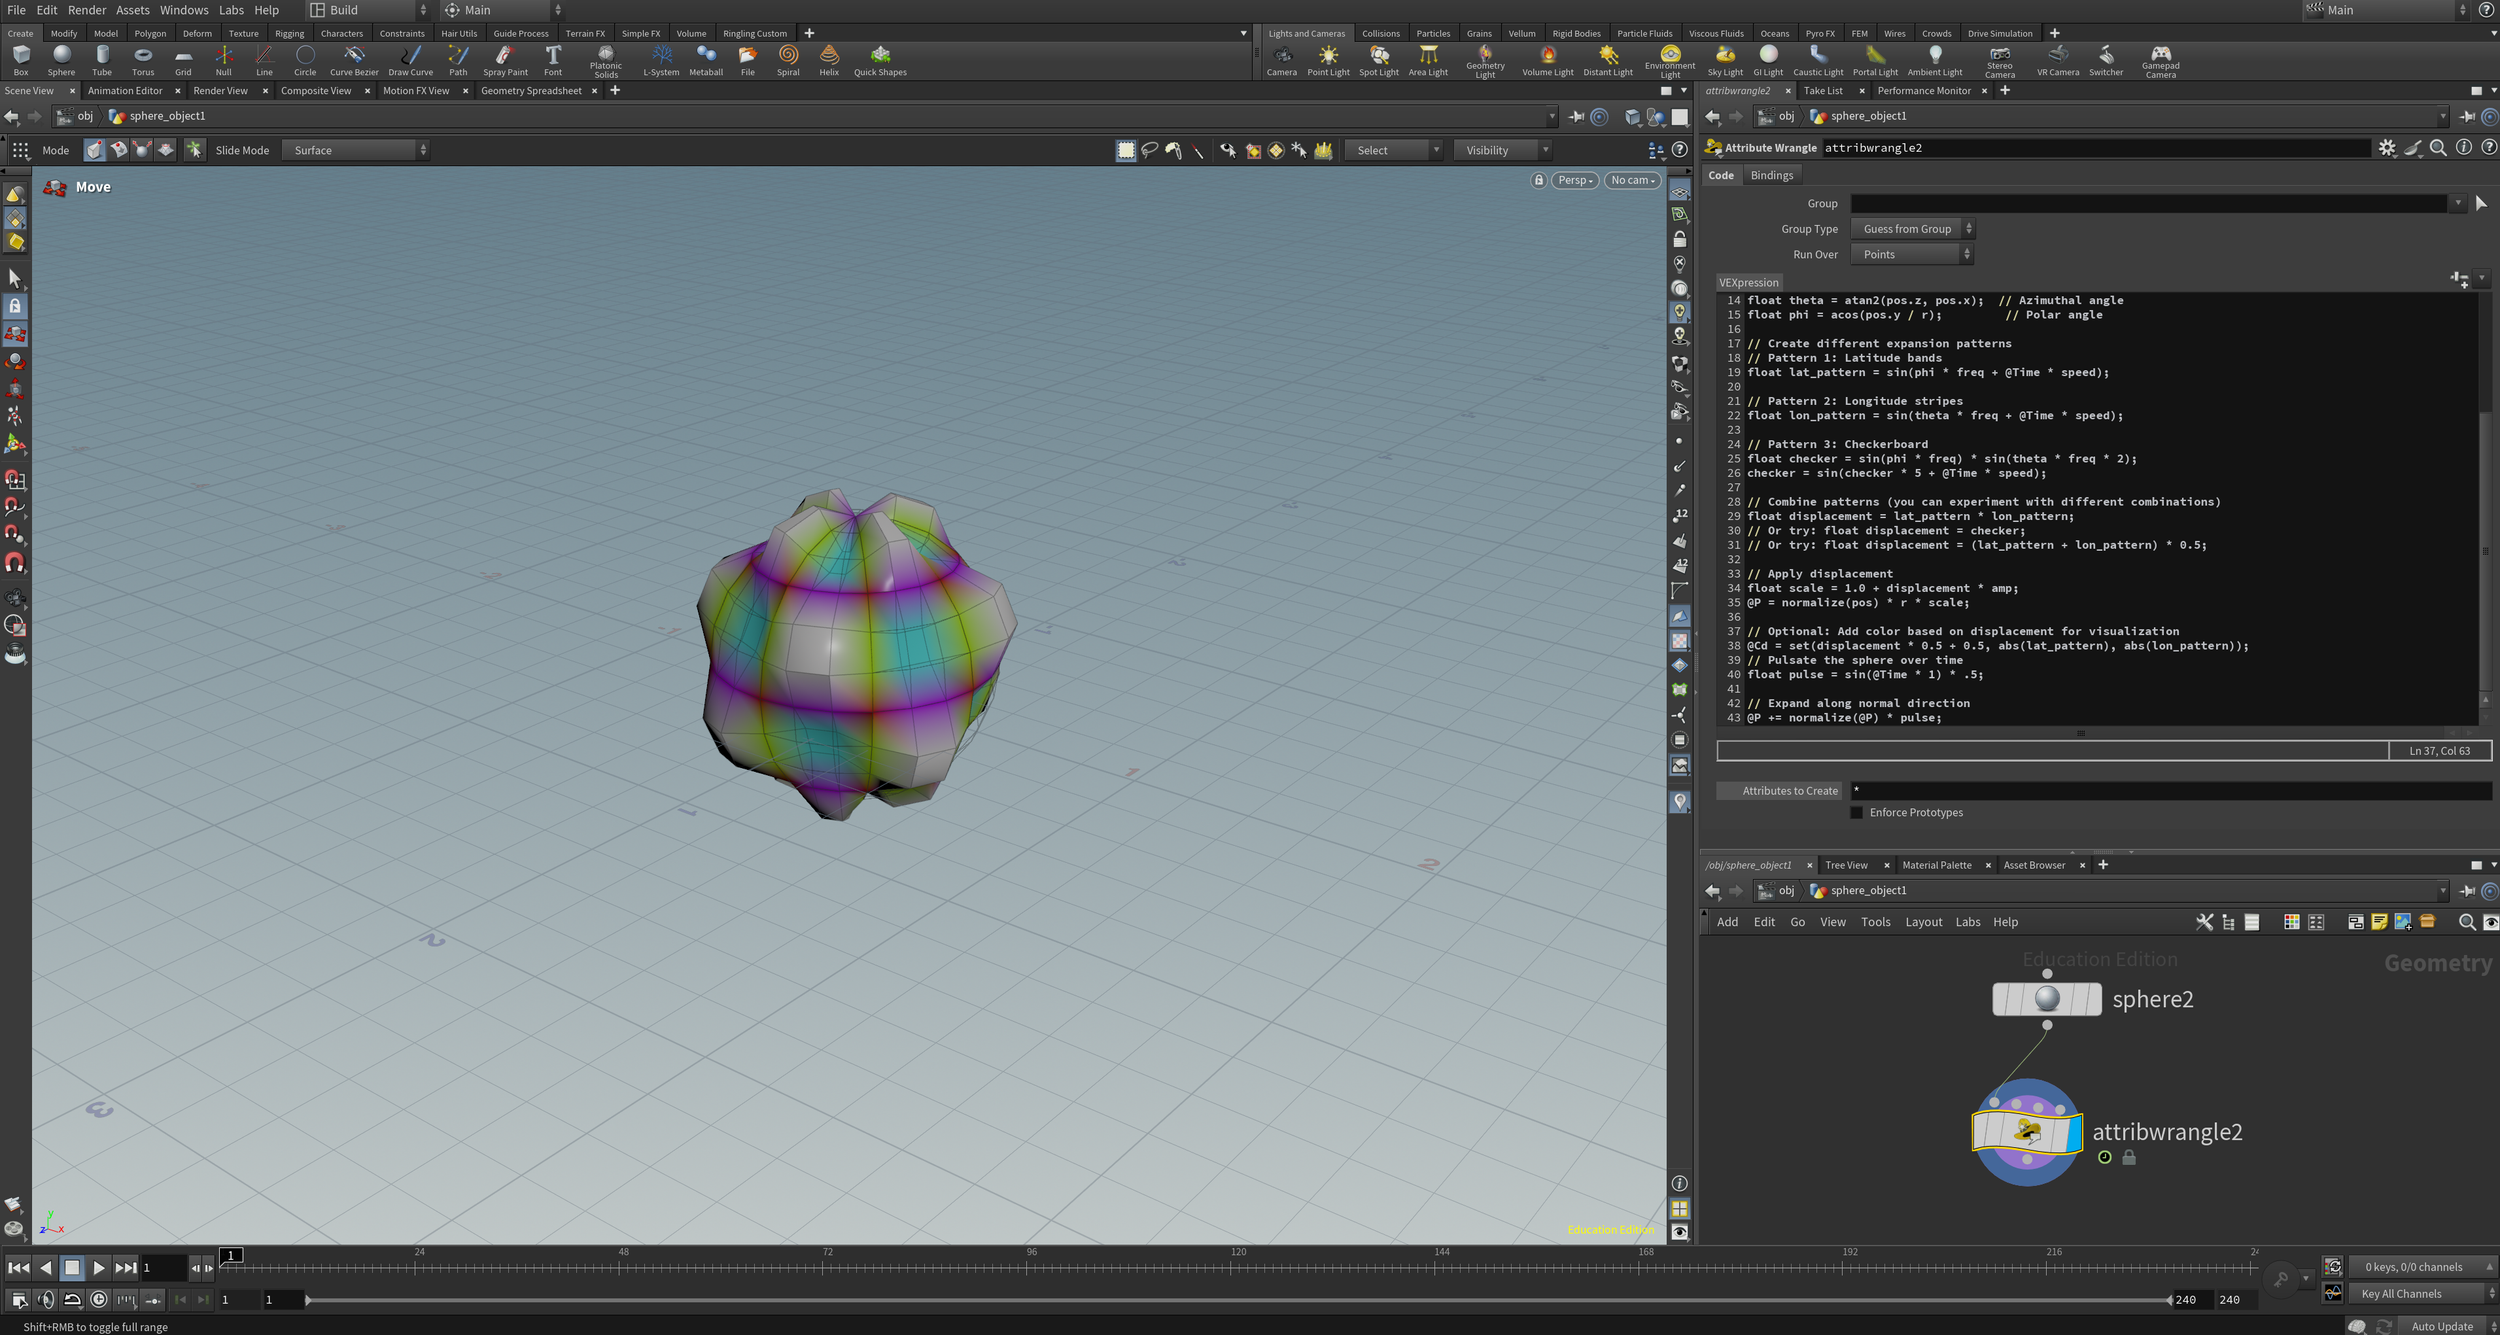
Applied Vex Code
Final Motion Test
With the combined codes, I was able to have the both successfully applied to the sphere and still have the ability to alter the speed and scale.
The final motion test was the same as the first two tests with the new and combined code. I was still able to edit the scale and speed of the volume.
This code was a combination of the two codes in one. I pasted the original pulsing code after the rippling texture code.
Combined Motion Test
Claude.ai Vex Code
